Tuesday, August 27, 2013

Putting Up Walls

The most important thing about our home is that it's functional for our family. The room that is the office was intended to be a "formal" living room when the place was designed. This makes no sense for us because we have one living room already, and there's no reason for us to have a room full of fancy furniture that no one is allowed to sit on. But, we do need an office and all of the rest of the rooms are taken - i refuse to move my office drumset. Now, the project below was 100% Chris' idea. I wasn't all the way on board, but then again...i don't have to be. The conversation went something like this:

Me: "I don't think we should close it off...it'll interrupt the flow of the house."
Chris: "I'm closing it off. You'll get used to it."

And then he pushed me into the kitchen.

But really, it boiled down to a "who wants it more?" type of decision: it was more important to Chris to close off the office than it was to me to keep it open. So i should mention here that i wasn't railroaded into this project. We have an "ultimate veto" rule whereas if one of us completely opposes a project or idea, then we move on. And i've had my fair share of project ideas that Chris is only so-so about...like the naming of our son. His first name was 100% my idea and Chris took some convincing. So, friends and family, if you don't like his name (we've gotten mixed feedback...which...really??) then it's my fault and i'm ok with it.

Moving on. Here's our office area. Not unpacked, the enormous desk just kind of propped against the wall. An overall mess.

Here's what it looked like as you walk through the front door:

Here's a shot of the office taken from the living room:

A shot from inside the office, looking at our dining room and various ride-on toys:

It begins with removing the baseboards. I should mention that this will be a floating wall...no removal of the wood flooring or adjustments made to the structural integrity of the house, so there were no permit$ needed.

Within a few hours, the frame was up:

 ...and the doors were put in. I helped carry the doors in the house and the wood floors were promptly scratched. We chose french doors so it would help make it look more open and we would still kind of benefit from the light of the office windows.

My daughter and i decorated the frame. This is Chris' favorite of all the drawings i did:

And of course i put our names on it along with some other very heartfelt things that i'm not including on here. (We have to save some things for ourselves.) And maybe by "heartfelt things" i mean drawings of wieners and this is a family blog.

Soon enough, the drywall was up and we had a functional wall:
Sadie makes an appearance. Isn't she looking slim?

Here are your Before & Progress pics.


There you have it; a wall was put up in our nice open floor plan to make the office a more functional place. If it means that Chris will be able to work from home more often and not deal with this horrible commute, then it's worth it. And really, it's not as cramped as i thought it would be. It's actually kind of nice. It'll be even nicer after we mud and sand it and put some paint on it, and maybe a couple of doorknobs. Stay tuned for that mess...

Friday, August 23, 2013

Nickel and Dime-ing.

Ok, you little buckets. Let me tell you how we just saved ourselves $680.

Granted, in the grand scheme of things, this stuff is fairly frivolous as it doesn't involve our livelihood...so even if there was no way to save ourselves that money, we wouldn't have spent it anyway. (At least not in this decade.)

Moving on. I have a personal distaste for brass and i care not that it's "coming back." This is also how i feel about clogs. All of our fixtures around the house are brass, including the outside. This past weekend, we decided to put a stop to that madness. And by madness, i mean we had around 3,000 (small exaggeration) light fixtures to replace around the outside of the house. Here's a pic of our garage with its two front lights:
Look closer:

Enter Rust-oleum's Satin Nickel spray paint:

Why we went with satin nickel instead of antique bronze like i wanted: because marriage is about compromise/ burying your resentment deep down inside. But seriously - compromise.

We detached all the fixtures, disassembled them, cleaned out the bug carcasses -and some living spiders, much to Chris' dismay...

...and hung them for painting:

After what seemed like 57 coats (but was probably around 3 because Chris is thorough), they were left to hang and dry. They were then hung, and some touch-up paint was needed with a sponge brush.

GOOD. AS. NEW.


And with the number of outdoor light fixtures this place has, we'd have spent $700 on brand new ones. So, by using $20 worth of spray paint and spending a little time and patience, we saved $680 and got rid of our outdoor brass. I might just be wanting a bagel with my coffee.

Lets do some Before & After pics:


EXTREME CLOSE-UP:

 Much better, am i right?

Monday, August 19, 2013

She Chose Yellow.

This is a story about how my daughter acquired her amazing light fixture that you're all jealous of. I know. I don't know why this hasn't been pitched to Hollywood, either.

Once upon a time, there was Freecycle:
 (Photobomb by Haley)

Oh honey. I just love it. This was an amazing find acquired right before we moved into our new house as i knew that my daughter wouldn't have a light fixture in her room. But i couldn't leave it bronze-ish. So i asked my daughter what color she would like it to be. For once in her life she didn't choose red.

We shortened the chain a bit so it wouldn't hang so low.

(Room in Progress)

Perfect, right? The whole project was basically free since i already had the can of yellow spray paint on hand. But if you want to count the price of the paint, it was around $6. SWEET.

Friday, August 16, 2013

Update on Internal Affairs.

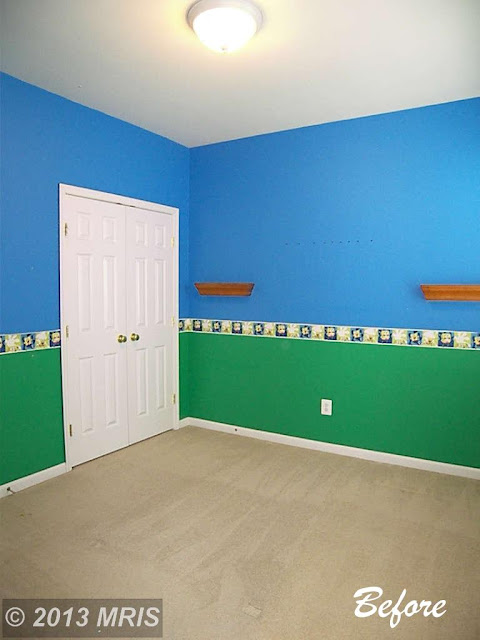
One of my highest priorities as a parent is to make sure that my kids feel comfortable, secure, and at home. I want that for us big people as well, and it starts with everyone's own personal rooms in the house. That's why I've been giving the bedrooms the most attention in the beginning (Chris is busy with a larger project downstairs). There's one thing i should prepare you for, and that's the "curtains" in the kids' rooms. We have none. We had to nail blankets to the wall...a trick i learned from Kate Middleton. Also, take notice that we've replaced our carpets because i'll be offended if you don't. That ish was expensive. So now that you're prepared, here's a quick, pic-heavy update of our bedroom progression:

Boy Kid's Room:


(again...sorry for this.)

Still to do in Boy's Room: Curtains, Change out light fixture (he'll be getting the one that's currently in the Master), Switch him out of Nursery mode...but i'll drag my feet on that one.

Girl Kid's Room:


(She chose the top color herself)


Still To Do in Girl's Room: Curtains, Toddler bed to Full bed, Something for the wall over her bed

 Big People's Room:


Still To Do for Master: Switch light to ceiling fan, hang curtains, hang pictures, make better use of space

Not too bad for being here for three weeks, yes? And like i mentioned, we are working on a larger project downstairs so our efforts are being split. And again, the curtain thing will be rectified once i get the money and maybe an excellent coupon for JoAnn Fabrics, since i plan to make the curtains. And yes, i'm definitely making them. I'd need 108" panels, and for the cost of one of those panels, i can make a pair with blackout liner from JoAnn's. Because i'm craftypants.