You guys. I am so excited that
i strong-armed Chris into we both agreed on this backsplash. When i left you with our last kitchen update, i gave you two tile options that we were choosing between:
We also considered beige stone (way too boring), mosaic (too busy - would compete with our countertops), white porcelain with a dark grout (didn't want porcelain), a smokey glass (looked a little like poop), slate stone (too hard to clean), and giving up and painting the wall (over my dead body).
In the end, the white was too white. The blue? Awesome. We knew we wanted a subway tile and while we would have preferred a larger tile size, we couldn't find one that fit our price range. We got this stuff at Home Depot for $8.97/sq.ft. Not bad.
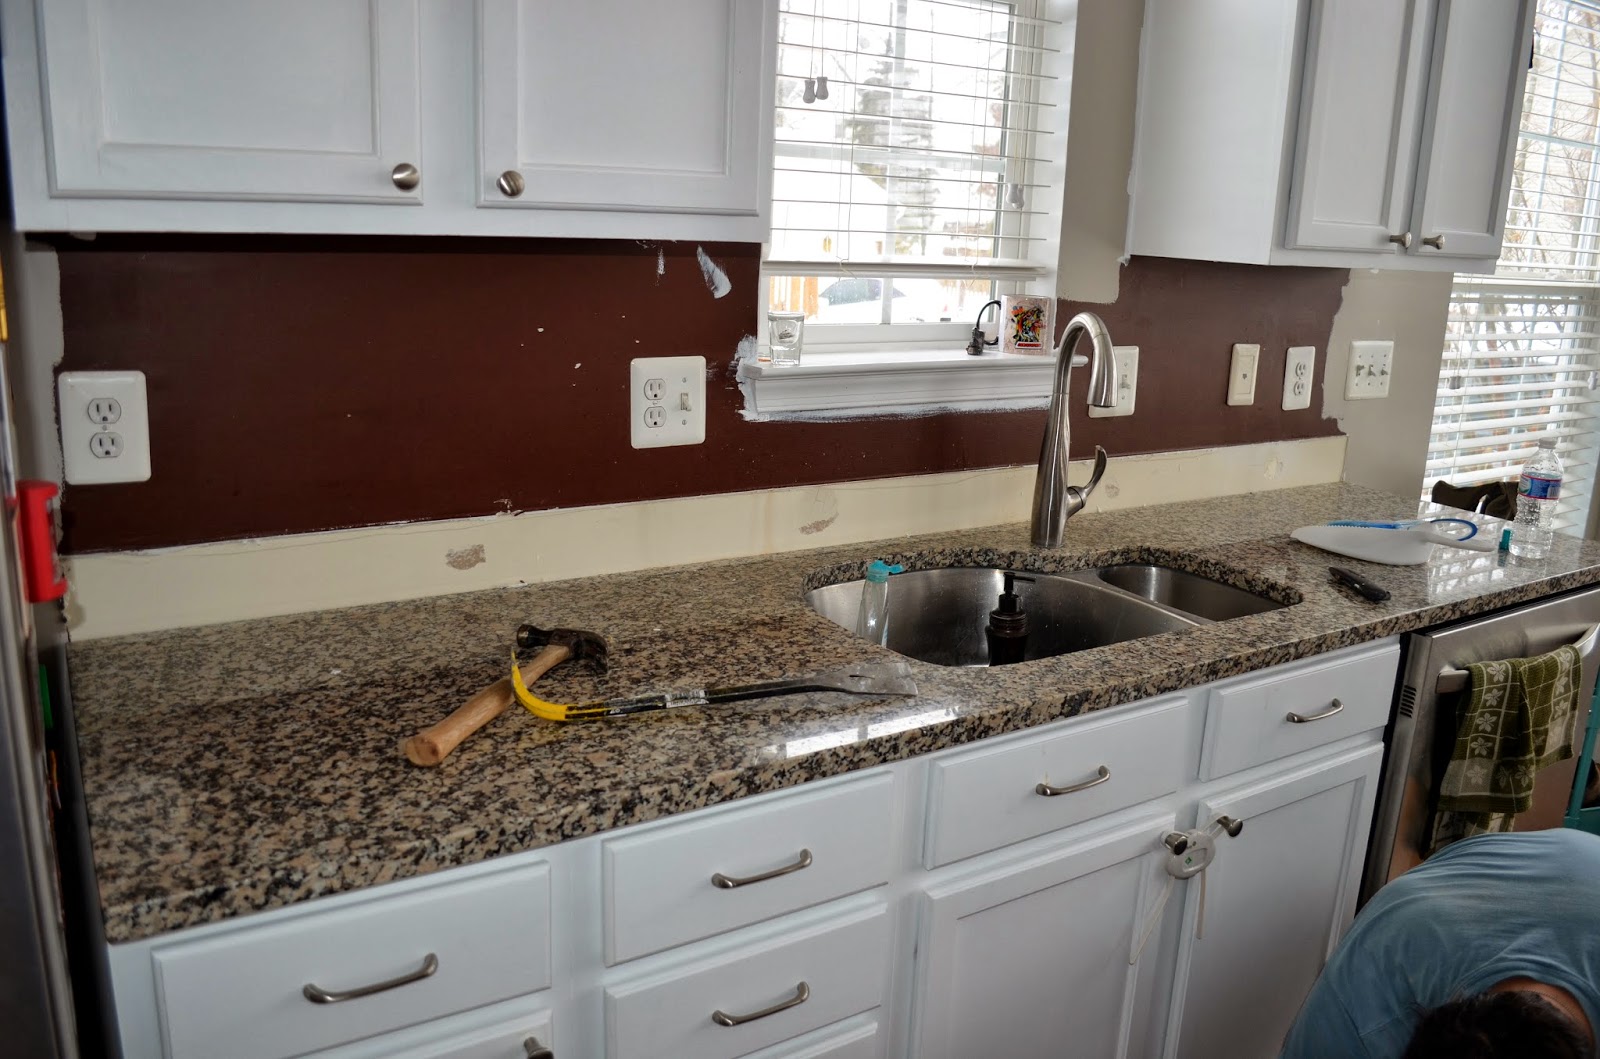
Here's where i left you with the last kitchen update:
Great. Lets get started.
First things - get rid of that 4" granite surround. (*Fun fact: for the price you pay for all that extra granite that doesn't do any good, you could put that money towards a full-wall backsplash. Do that instead.) Get at it with a blade...
Then a crowbar...
Look at that. At least an inch more of counter space.
I then scraped it with a blade and got rid of all the glue residue.
Next step: framing out the backsplash. We wanted a nice, finished edge, so we picked up some stainless steel pieces that Chris cut and bent to size.
Then he grabbed the nail gun and nailed it to the wall.
Then we really got to work. We got over half of one side done when Chris said, "why aren't you taking pictures?" to which i replied, "i kind of have my hands full at the moment." So looky who gets to be in pictures!
I make weird faces when i'm working. SIKE! That's my normal face.
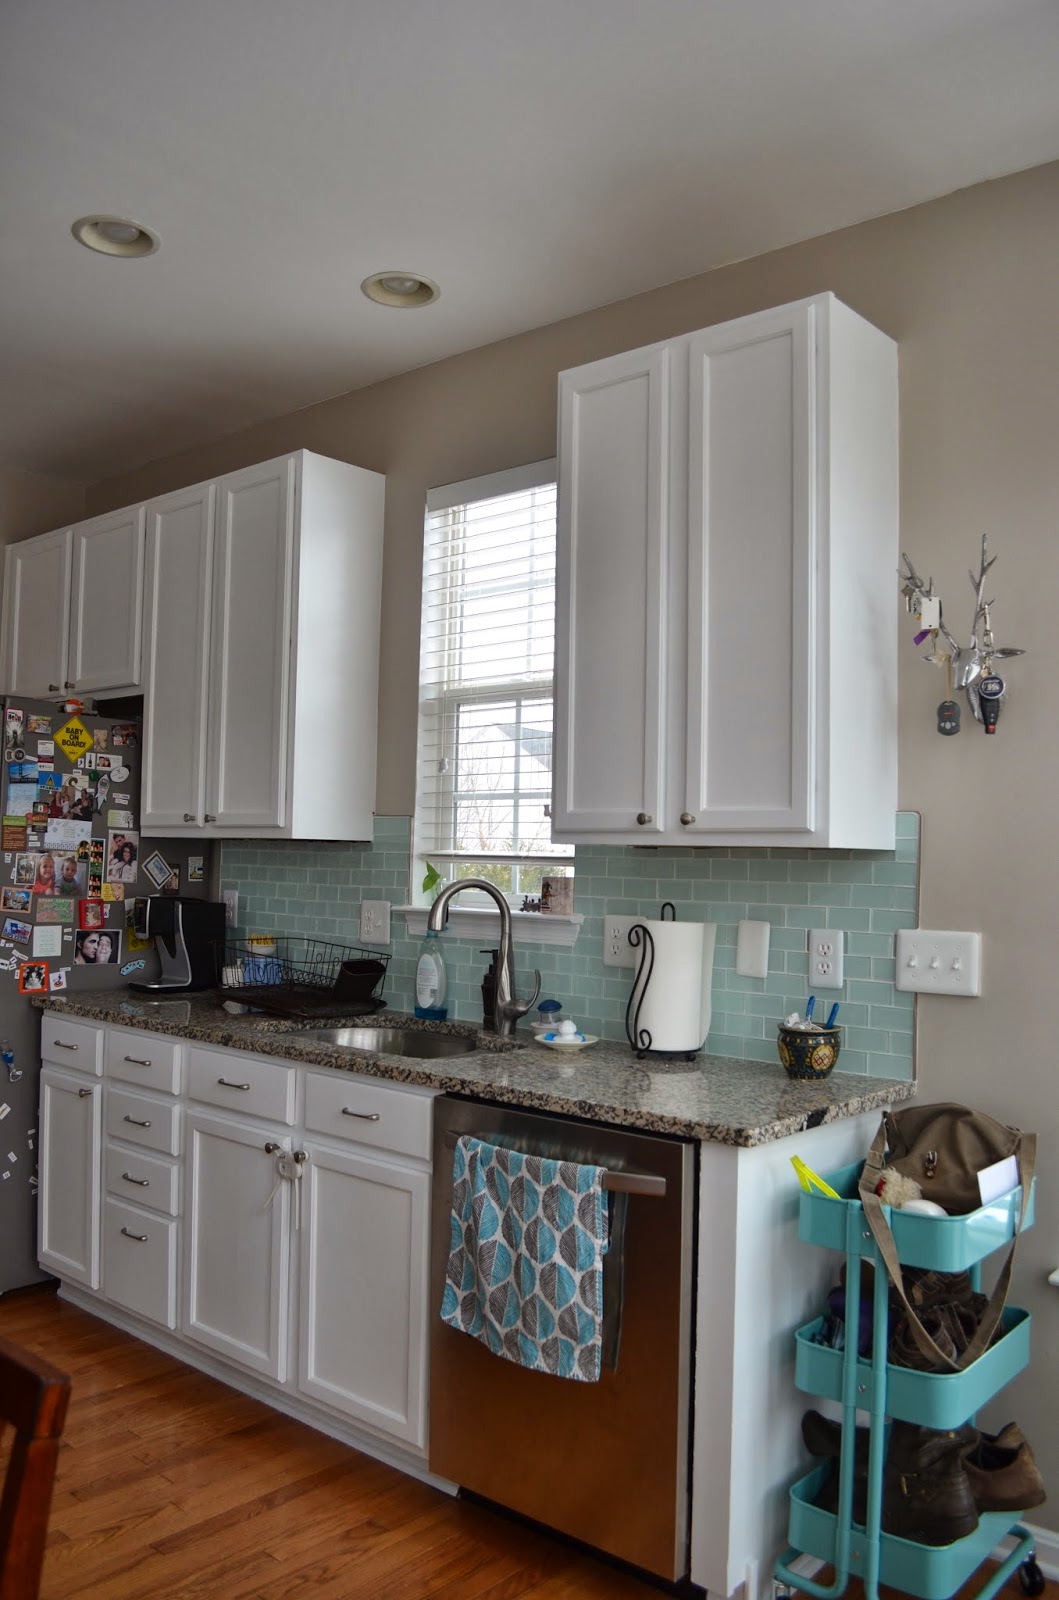
And it's up!! No grout or anything, but it's up.
Grouting is the easy part. We used an unsanded grout and it was done in 30 minutes.
Grouted and waiting to be sealed:
Now, because i insisted that the tile be lined up with the counter as opposed to the cabinets, we had an issue with a lightplate.
Luckily, Chris is my husband and he's your modern MacGyver. So he fashioned a little contraption to raise the light plate about .5" off the wall. Our son helped:
We used magic putty (i really have no idea what it's really called, but it totally works) to stick it all together.
See? Now it's just waiting for paint.
We ended up getting all new light plates, light switches, and outlets (a few were loose and we didn't want to chance anything). Once all those were changed, we can call it DONE...for now...
(^Sad banana.)
Next month, i REALLY want to put some crown moulding on top of the cabinets because it looks naked up there. And i don't appreciate things on top of cabinets aside from chicken wire spheres...which i'm seriously considering.
Progression pics?
I love the blue. It feels so fresh and clean. So fresh & so clean, clean.